Note that Scribl is a participant in the Amazon Associates Program, an affiliate advertising program. That means that Scribl can earn fees if you buy anything after following these links. This helps us promote all our authors' books and continue to provide free titles to our customers at our expense. If you are considering buying anything you see listed here, please consider following our link when you do.
Setting the Recording Levels in Audacity
In the previous section, Configuring Audacity to work with your Microphone, you configured Audacity to work with your hardware. Now you're ready to fine tune so the recording levels are optimized for your voice, and environment. Part of the purpose of this section is to teach you to use Audacity so you have the knowledge to tune it for optimal sound quality.
The goal in setting the recording levels is to maximize dynamic range, or the difference in recording volume between the load and quiet parts. To do this, we need to balance two competing factors:
Minimize the noise floor (no sound when you're not talking)
Maximize the volume (loud enough when you are talking)
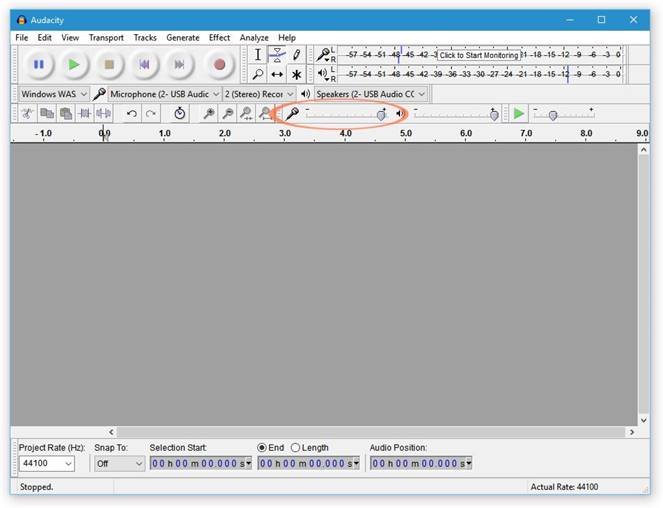
To do this, start by clicking where it says, "Click to Start Monitoring" on the Recording Level meter.
When you click there, the text will disappear and you may or may not see the green Recording Level monitor moving in response to sound near the mic. If you are using the Xenyx 302USB, be sure the GAIN and MIC dials are turned to 6, as indicated in Step 6 of the device setup.
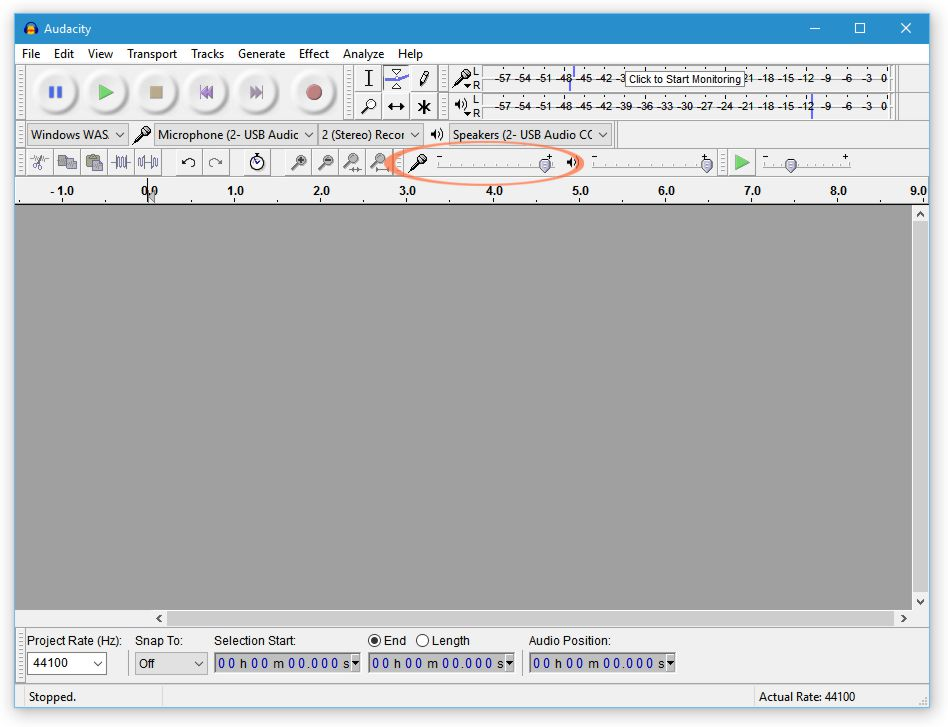
Move the Recording Volume slider all the way up toward the + on the right (the slider with the icon of the microphone to the left, circled in the figure below). Make some sounds into the mic as you make these changes. If you don't see any green or motion in the Recording Level meter when the Recording Volume slider is turned all the up and you're making sounds into the mic, then most likely either the mic is not physically connected correctly, you selected the wrong Recording Device in the prior section, or something else is not set up properly. Please review the prior steps, including the device setup for the Xenyx if you're using the mixer. Before moving on to the next step, it is essential that the Recording Level meter moves in response to sound or tapping the head of the mic.
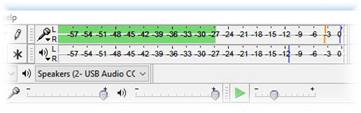
The next few steps are the most sensitive part of the setup to get right. You probably won't at first - not until you can make multiple recordings and compare them - and that's OK. For now, if you're using the Xenyx mixer, temporarily turn the GAIN and the MIC all the way down on that device. If you're using the AT2005 connected via USB, turn it off by the switch on the mic. In Audacity, be sure the Recording Volume slider is still all the way up and the Recording Level meter is on (verify it does NOT show "Click to start monitoring"). You may see the green Recording Level bars moving a little bit, even if it's quiet. If you don't see any green bars moving in the Recording Level meter since turning off the mic or turning down the mixer, congratulations, you have a nearly noiseless system even at the 100% volume setting in Windows! If you do see the green bars moving, this is normal and represents the background electronic noise of your system. Slowly, one tick at a time, slide the Recording Level slider to the left until the green bars on the Recording Level flicker just at the bottom of the meter, without ever crossing the -57dB line. Note the value that you've set the Recording Volume slider. If you didn't need to move it because there was no noise to start, your value is 1.00. On my system, it's between about .91 and .94, depending on the hardware connected. This is what we'll refer to as your Electronics Noise-Free Recording Volume.
Keeping yourself and the room quiet, turn on the mic and/or turn up the Xenyx GAIN and MIC to 6. The noise shown on the Recording Level meter may have increased a little bit from ambient sound that the microphone is capturing. Repeat the process from the prior step, by turning down the Recording Volume level one step at a time until this new noise floor drops below ‑57dB (so it's just flickering at the left edge of the Recording Level meter). On my system at home, it runs at about 0.89. Note this new Recording Volume setting as your Complete Noise-Free Recording Volume. In a sound studio with a good mic, your Electronics Noise-Free Recording Volume would be the same as the Complete Noise-Free Recording Volume.
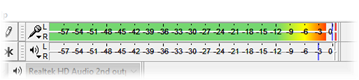
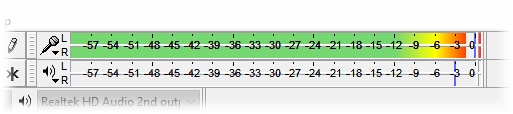
Talk into the mic the way you think you'll talk when you're recording. Watch the Recording Level meter. The difference on the Recording Level meter between the lowest level during silent times and the peak level when you are speaking is your total dynamic range. The greater this difference the better. You can increase the top end and therefore the dynamic range by getting closer to the mic, but don't artificially boost it by shouting. It's just as important that your voice sound natural and unstrained. Ideally, your Total System Noise floor when everything is quiet would peak at around ‑57dB, and when you talk, you're pushing the green bars up to somewhere between ‑15dB and ‑3dB (pushing into the yellow or orange is perfect). That means you have excellent dynamic range.
Find the status below that matches yours to finish tuning your Recording Levels and follow the instructions
If your Complete Noise-Free Recording Volume is greater than 0.5 and less than 1.00 and the Recording Level pushes up above ‑15dB but not higher than ‑3dB when you speak, then perfect - you're done with your adjustments! Use your Complete Noise Free Recording Volume determined in step 4 as your Final Recording Volume. Every time you start Audacity to record, confirm that the Recording Volume is set to this level. Proceed to Recording with Audacity.
If your Recording Level pushes past ‑3dB (moving all the way into the red) and your Complete Noise Free Recording Volume is greater than 0.5, then turn down (slide to the left) the Recording Volume one unit at a time and repeat the test until your Recording Level stays below ‑3dB. Once you get the Recording Level below ‑3dB, note the Recording Volume level as your Final Recording Volume (confirm that the Recording Volume is set to this level every time you start Audacity to record) and proceed to Recording with Audacity. If you reduce the Recording Volume below 0.5 and are still exceeding -3dB, then refer to one of the next two options (depending on whether or not you are using the Xenyx mixer).
If your Recording Level pushes past ‑3dB (moving all the way into the red) and your Complete Noise Free Recording Volume is less than 0.5 and you are using the AT2005 direct USB connection, then you must keep turning down the Recording Volume one unit at a time and repeating the test until your Recording Level stays below ‑3dB. Note your Recording Volume. This is your Final Recording Volume. Every time you start Audacity to record, confirm that the Recording Volume is set to this level. Proceed to Recording with Audacity.
If your Recording Level pushes past ‑3dB (moving all the way into the red) and your Complete Noise Free Recording Volume is less than 0.5 and you are using the Xenyx 302USB, then turn down the MIC and GAIN dials on the Xenyx mixer one unit at a time and repeat the test until your Recording Level stays below ‑3dB. Note your Recording Volume. This is your Final Recording Volume. Every time you start Audacity to record, confirm that the Recording Volume is set to this level. Proceed to Recording with Audacity.
If your Recording Level doesn't reach higher than ‑15dB and your Electronics Noise-Free Recording Volume was originally at 1.00, then you may be able to fix this by turning up the MIC and GAIN on the Xenyx 302USB. If you are only using the AT2005 connected directly to your computer via USB, then consider buying the Xenex 302USB mixer or the Zoom recorder and following those setup instructions. If you do have the Xenyx 302USB, then turn up the MIC and GAIN in unison by one point (first to 7, then if you end up back here, to 8, etc). and repeat steps 4 and 5 with these increased MIC and GAIN settings.
If your Recording Level doesn't reach higher than ‑15dB and your Complete Noise-Free Recording Volume is below 1.00, then something is wrong. Your voice is coming across as too quiet for some reason. You might think you should turn up one of the various gain settings, but that wouldn't help at all, because it would also increase the noise. Instead, try the following to overcome the problem:
You may still be able to get good results using Audacity's Noise Reduction Effect after you have finished your recording, especially if your Recording Levels are not too far off and at least reaching above ‑21dB. However, this is not ideal - your dynamic range is on the low side. To try this, proceed to Recording with Audacity and try using Audio File Processing with Audacity.
Make sure you are close to the mic when speaking. Talk in a strong natural voice. Maybe you're just speaking too softly, but don't raise your voice unnaturally so that it sounds like you're shouting. Go back to step 5 to work on your voice (go all the way back to step 2 if you have already made changes to the volume levels).
If there is a large difference between the Electronics Noise-Free Recording Volume you measured in step 3 and the Complete Noise-Free Recording Volume from step 4, then this problem could be the result of turning the volume down to reduce ambient background noise. Try making the room quieter and starting the whole section over, hopefully achieving a higher value for your Complete Noise-Free Recording Volume. Otherwise, your environment may make you a candidate for the Zoom recorder or Zoom recorder with external mic (you can use the AT2005 you already bought in place of the Shure SM58 described there).