Note that Scribl is a participant in the Amazon Associates Program, an affiliate advertising program. That means that Scribl can earn fees if you buy anything after following these links. This helps us promote all our authors' books and continue to provide free titles to our customers at our expense. If you are considering buying anything you see listed here, please consider following our link when you do.
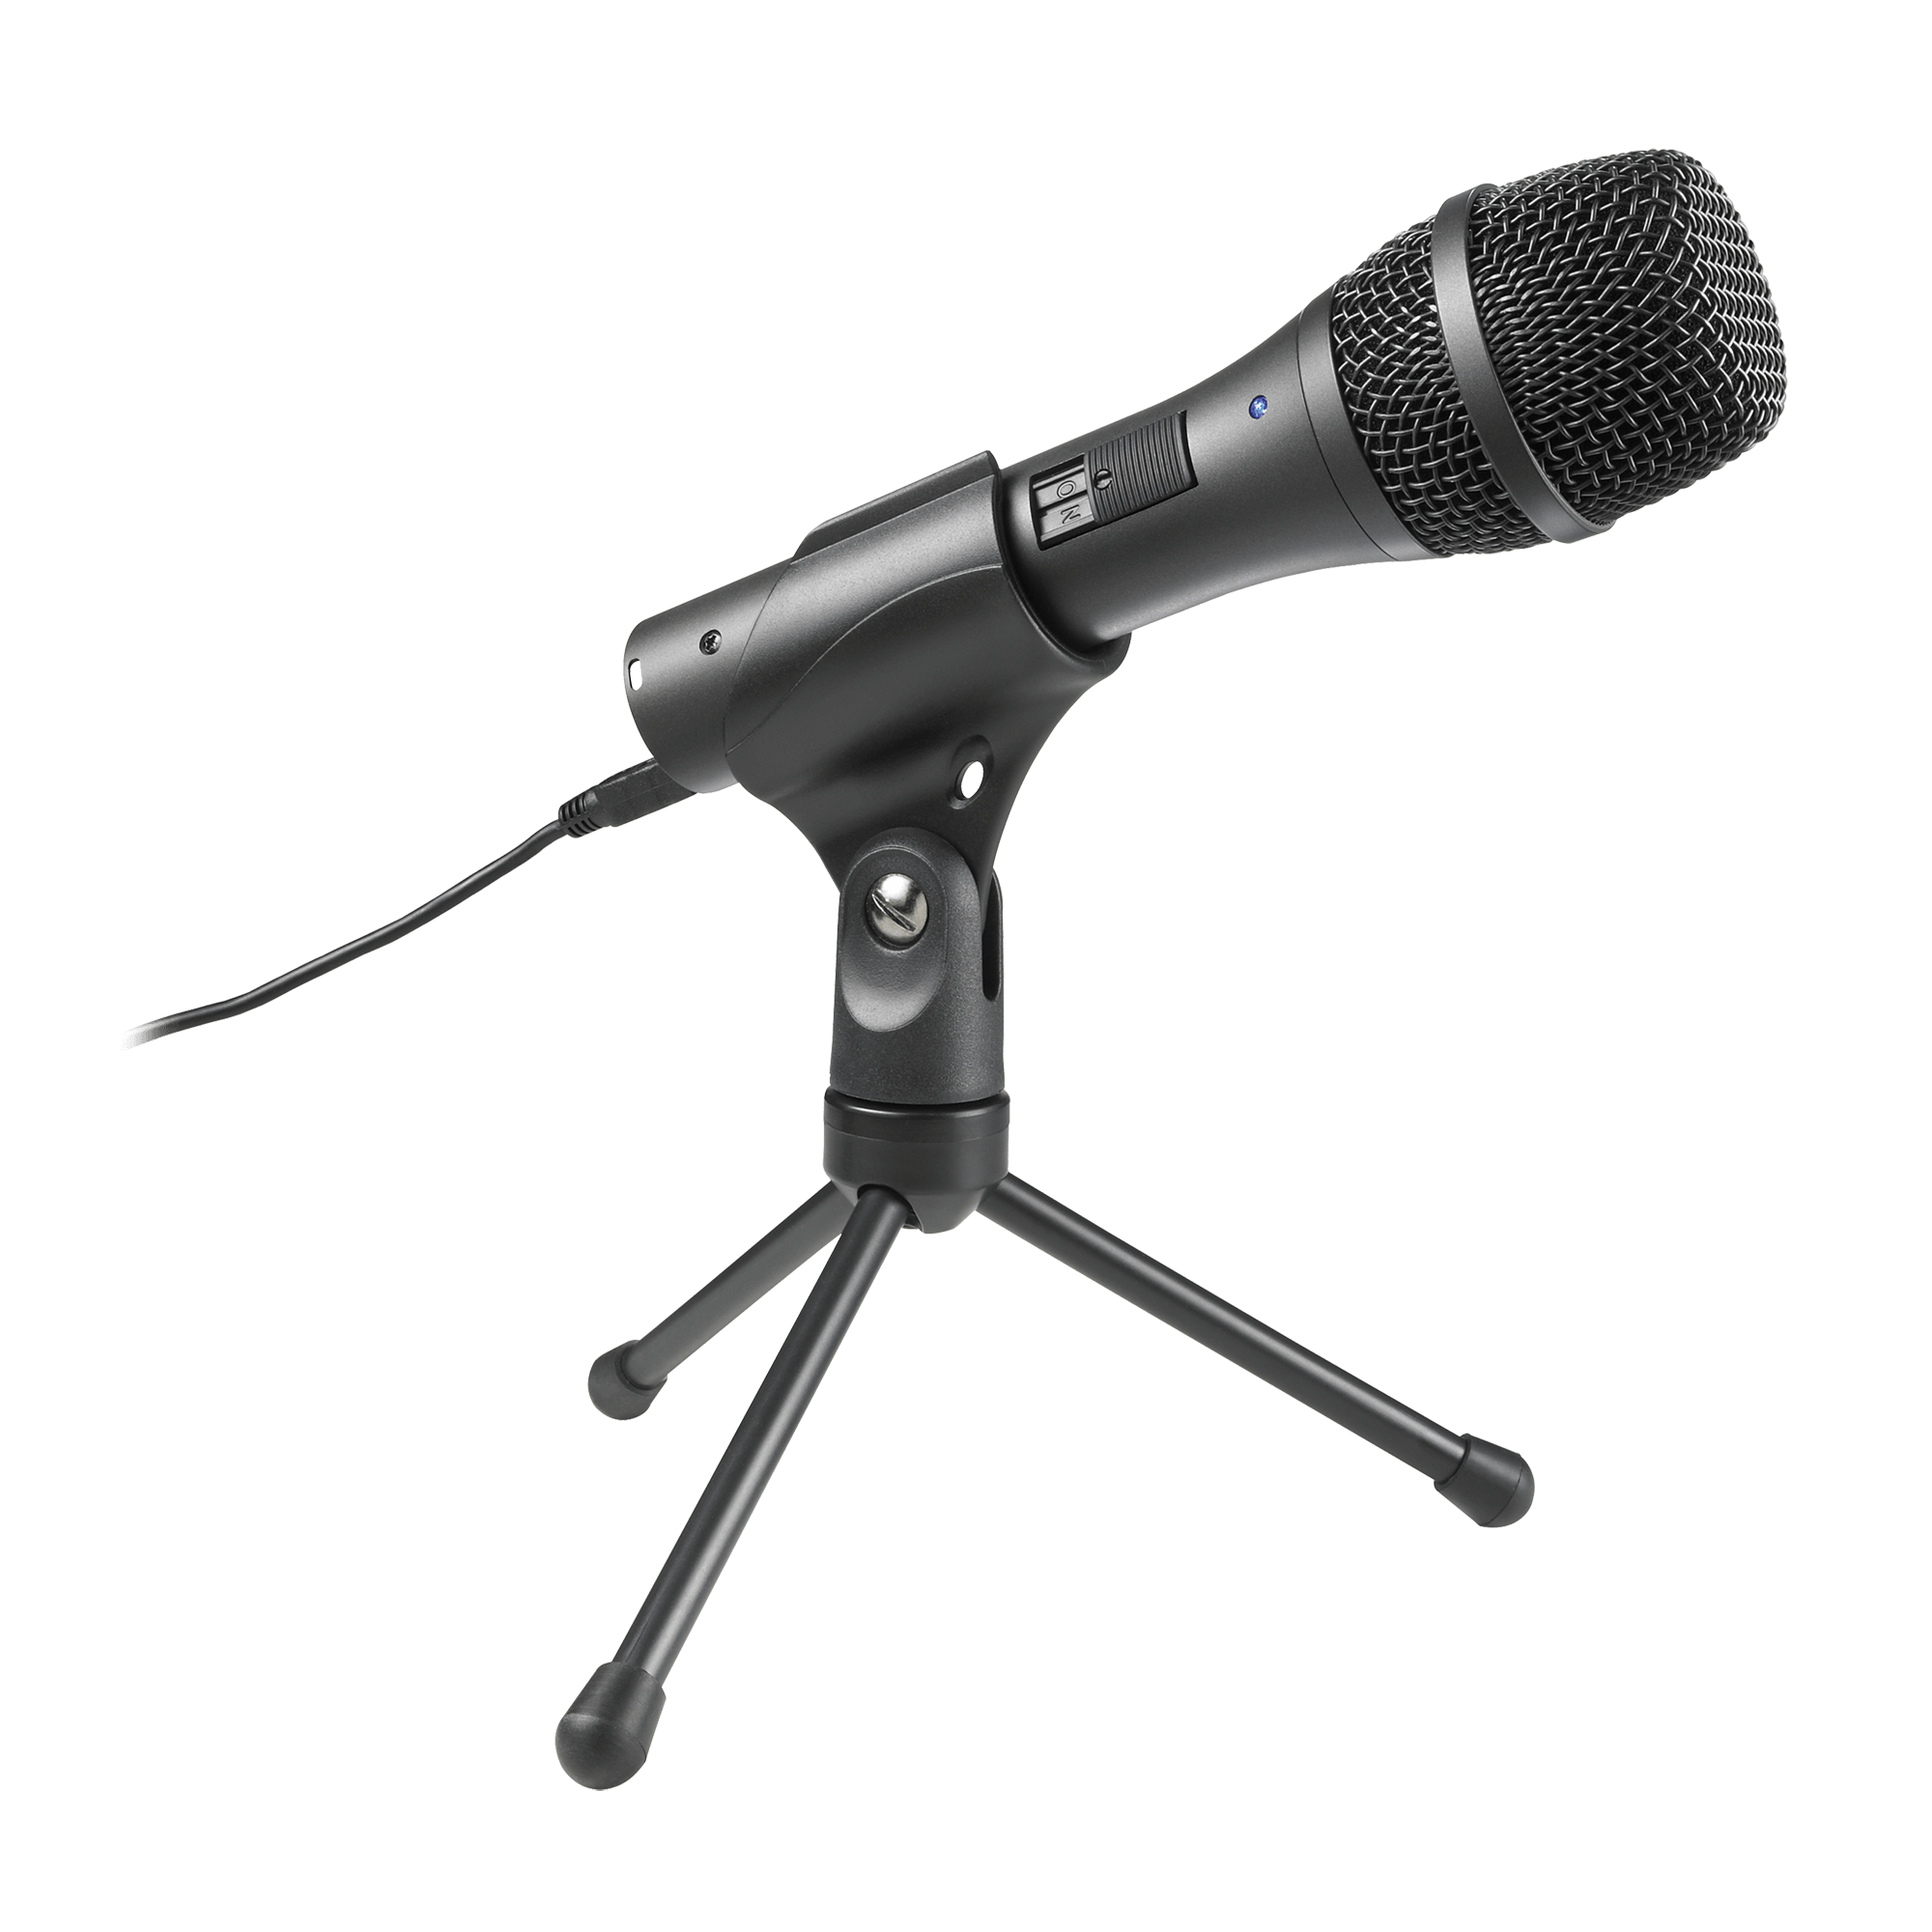
This is a USB Cardioid Dynamic microphone. USB means you can just plug it directly into your computer. From there, the software we'll recommend can record whatever you say into in the mic. The other mics on our Optional Upgrades page will deliver better results, but they all cost more too. If you're just sticking your toes in the water of recording your own audiobook, this is a fine starting point.
In spite of the low price (and yes, $80 is a low price for a decent microphone), this is actually a really good microphone. In comparisons with much more expensive mics, the AT2005 consistently tested as producing superior sound. It includes a headset jack so you can listen to your voice as you record, which can be helpful as you become more accustomed to how your own voice sounds while recording.
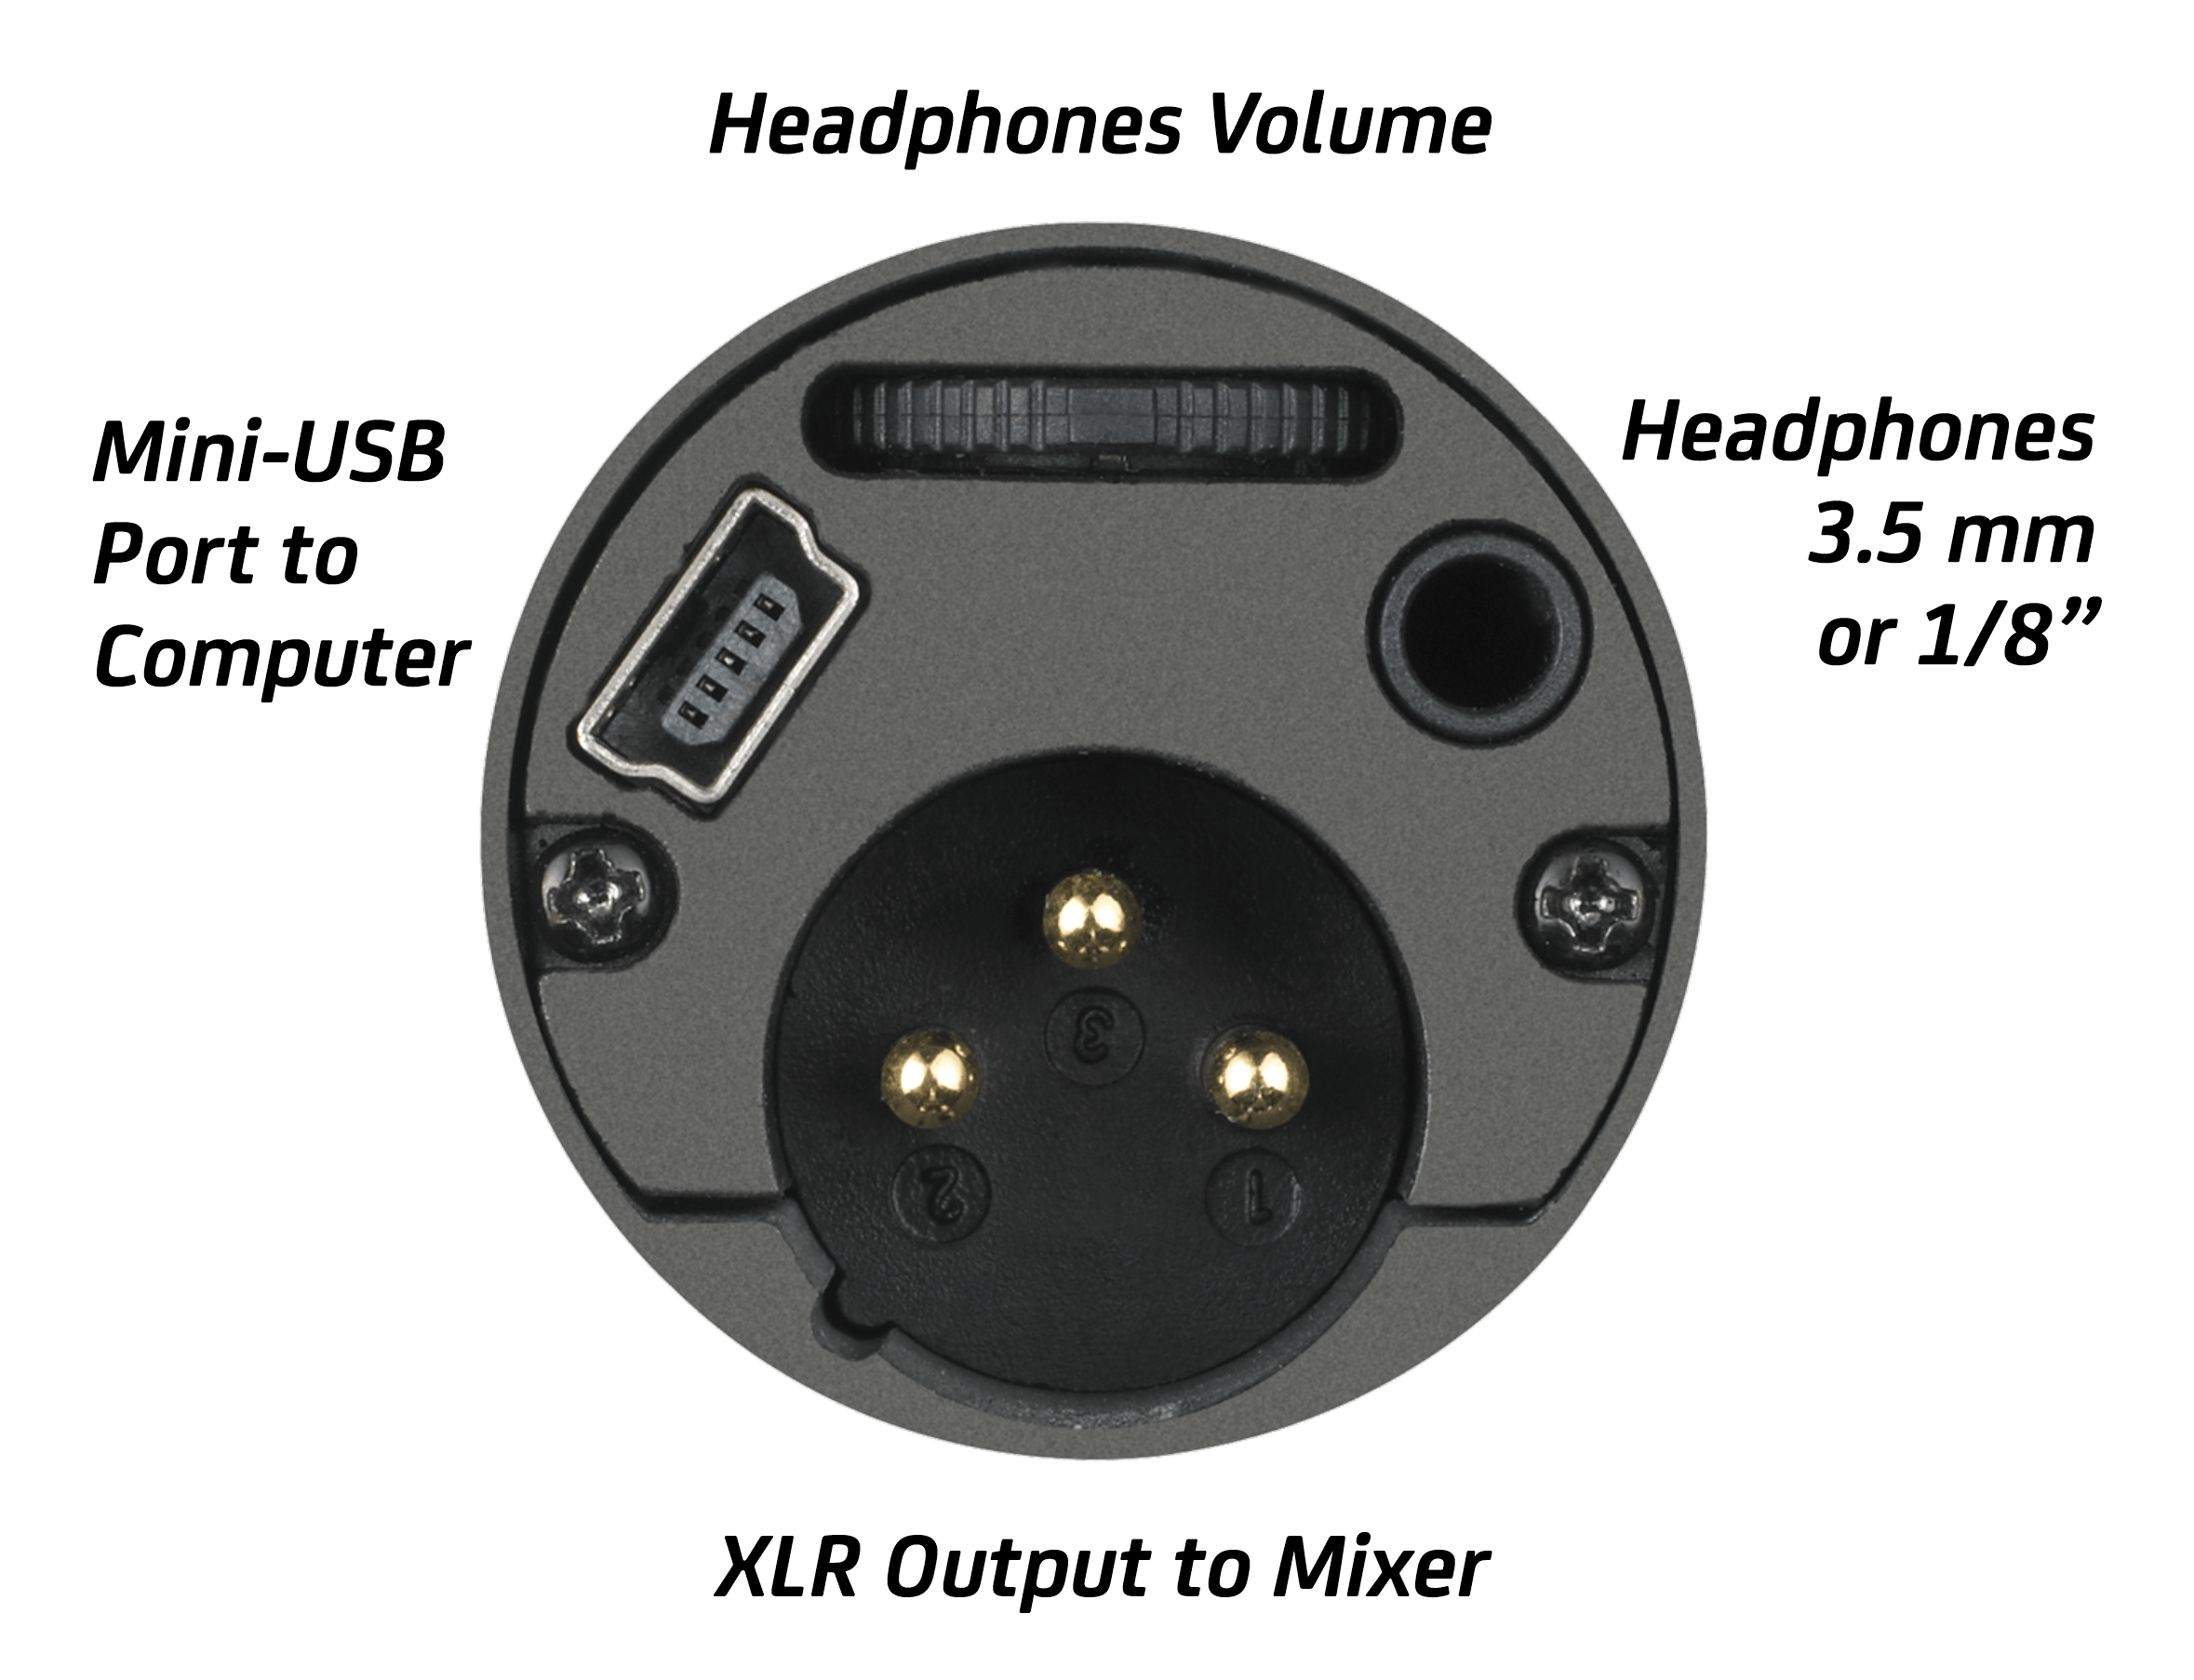
The AT2005 uses the old mini-USB port, which is rare these days, but it includes the USB cable, so this shouldn't be a problem for you, unless you lose or break the cable. It also includes a little microphone stand. However, you may want to upgrade to a better stand or arm mount or to a newer and slightly enhanced version of this mic, the AT2005 x. See Optional Upgrades.
The listed windscreen is just a bit of foam that helps reduce plosives, the breath pops that accompany saying words with the letters P or B in them. You want to get close to the microphone so that your voice is as loud as possible relative to the ambient noise, but not so close that you produce plosives. The windscreen helps you get closer without generating plosives, especially if you also don't talk directly into the mic but position it a little bit off to the side of your mouth. Some people's voices naturally generate more plosives than others. If you find the windscreen is not enough, you should upgrade to a "pop filter" such as the one listed under Optional Upgrades. That's a few dollars more, but will dramatically improve your audio if you're getting plosives without it.
In addition to the mini-USB port, the AT2005 also includes an XLR port. USB is what you use to connect directly to your computer. It is the easiest connection to use, but if you later want to upgrade, one of the best options is connecting the mic to a mixer and then connecting the mixer to your computer. Mics connect to a mixer via an XLR cable, so with the AT2005, you'll have that option without needing to upgrade your mic at the same time.
For starting simple and keeping costs down, a USB mic makes sense. However, be aware that there are 2 key weakness to plugging a mic directly into your computer via USB:
USB electronic noise in the analog mic
No opportunity to run the mic through a mixer and amp, which can really improve the sound quality
You may address those in part via computer software (called "post-processing"), but that takes more work, and digital adjustments distort the sound, adding unpleasant artifacts. To the extent possible, keep your post processing to a minimum by starting with a good clean recording.
Physical setup of AT2005 USB connection is the easiest of all the hardware options
Put the windscreen over the ball of the AT2005.
Plug the USB cord into the USB port on the bottom/back of the microphone and into an available USB port on your computer. That's it!
If you want to use the included mic-stand, set the microphone in the stand. Note that if you place the mic stand on your desk, that's probably too far from your mouth for good sound - in amplifying that to be loud enough, you'll also need to amplify a lot of noise. Always try to be within a few inches of the mic, typically no more than 8", and preferably 2-4" (too close and you may get plosives without a pop shield). Also, you want to be sure you avoid noises from shifting your hand as you hold it or touching the table or desk on which it's sitting. It will pick up any such noises and those will ruin your recording. A microphone boom arm and shock mount serve to isolate the mic from these noises and will do much better than the included stand. See Optional Upgrades.
If using a headset to monitor audio, plug into the port on the bottom/back of the mic.
When speaking, point the top of the mic toward your mouth. If you need to reduce plosives, position the mic a little bit off to the side and pointed more to the corner of your mouth. Don't talk to the sides of the mic. As a cardioid microphone, the microphone picks up sound best from one direction, in the case of the AT2005, that's from the top.