Note that Scribl is a participant in the Amazon Associates Program, an affiliate advertising program. That means that Scribl can earn fees if you buy anything after following these links. This helps us promote all our authors' books and continue to provide free titles to our customers at our expense. If you are considering buying anything you see listed here, please consider following our link when you do.
Recording with Audacity
Now that your devices are connected, you have tuned the volume levels, you’re ready to start recording. This rest is easy.
General Tips
You mouth should be no more than a few inches from the mic. Too close and you may end up with excessive breath sounds or plosives (pops with your Ps and Bs), but too far and you’ll have to crank up the gain, which adds background hiss and noise.
If you find that you hear plosives even with the windscreen and your mouth a few inches from the mic, or you want to be able to turn down the gain to reduce noise without losing the volume of your voice, then it’s worth spending the few extra dollars for a “pop filter.” See Optional Upgrades for more.
Recording Steps
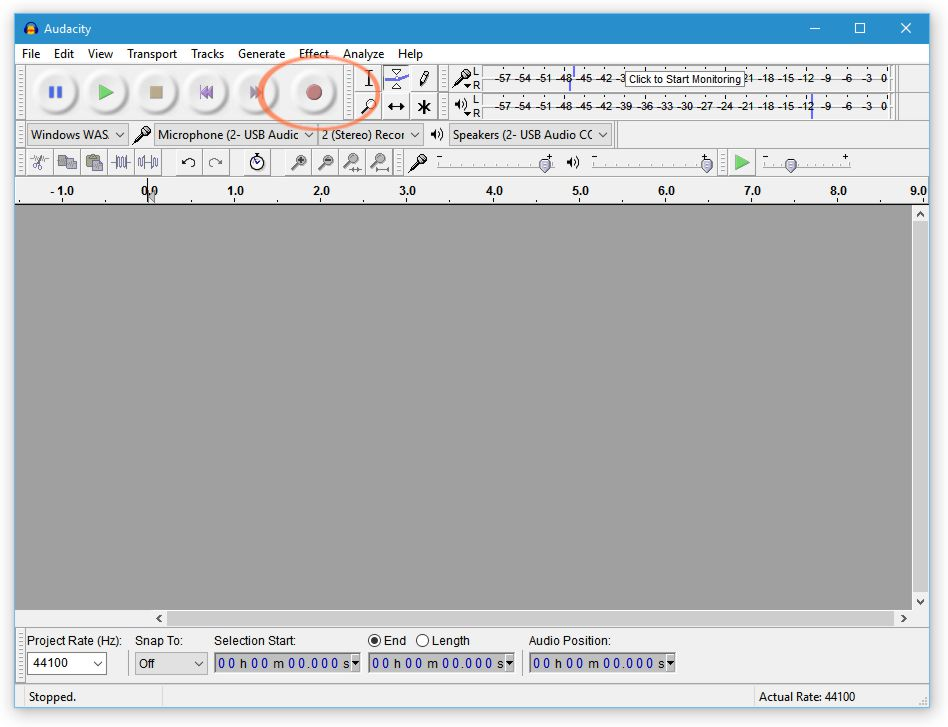
If Recording Level meter reads, “Click to Start Monitoring” click that first. Your volume levels should still follow the guidelines under Setting Recording Levels in Audacity.
As soon as you’re ready, positioned comfortably next to the microphone, with your copy ready to read without making noise as you scroll or turn pages, press the round red record button.
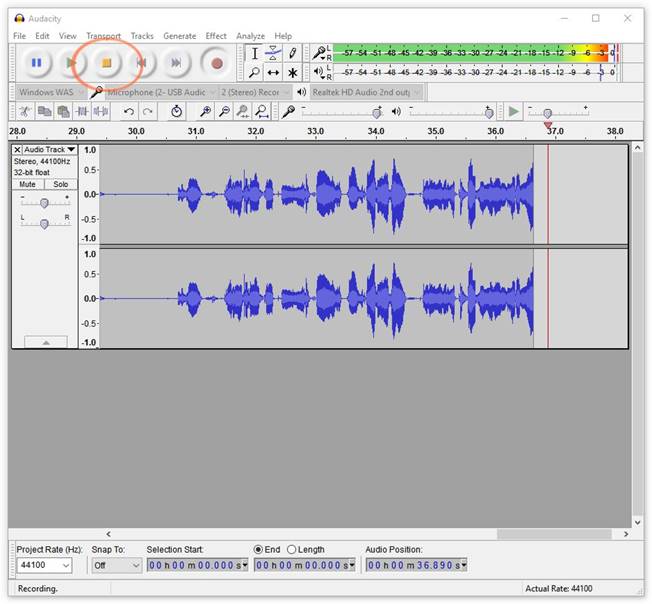
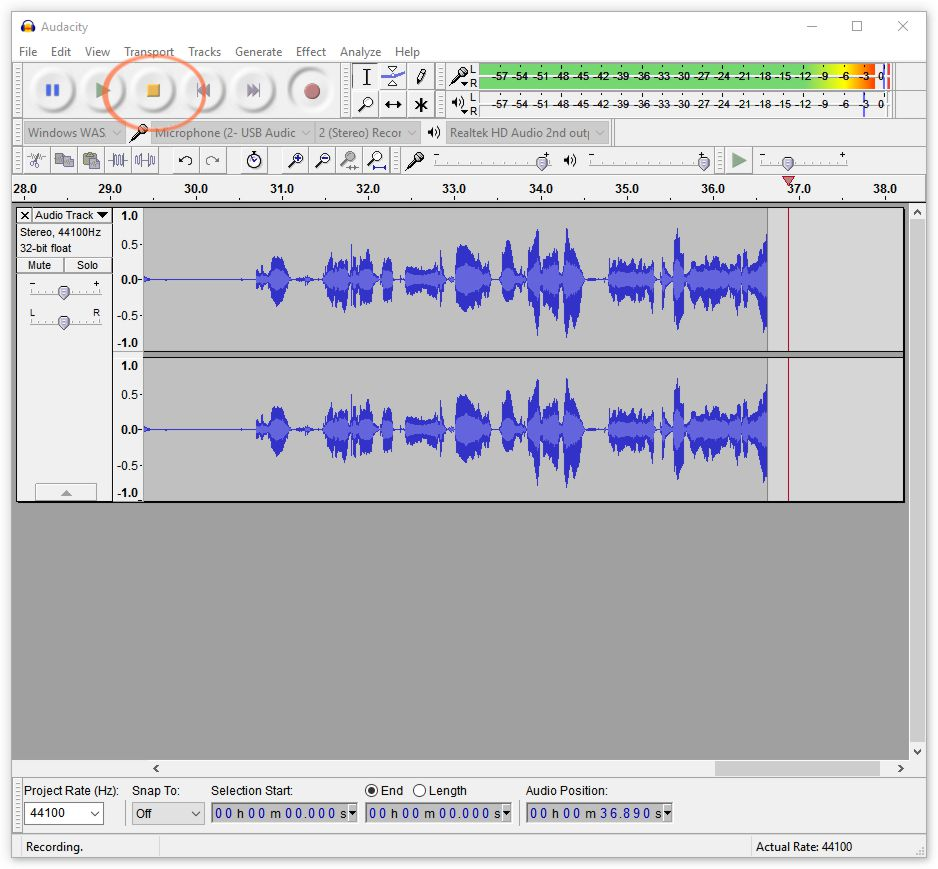
Notice that as you record, the blue bars in the Audio Track in the main window extend from the center line, vertically expanding and contracting with the volume of your voice. The numbers immediately above the blue track signal represent the number of seconds from the start of the recording (a little under 37 seconds in the image below). If you are pushing the green Recording Level meter into the yellow and red, the left (top) and right (bottom) blue bars on audio track will be pressing closer to the top and bottom of their respective lines. Ideally, you’ll frequently push the Recording Level into the yellow, sometimes orange, but only very rarely or never into the red. If you cross zero, the sound will be clipped, and that’s bad. The Recording Level meter in the image below shows an example of audio that is getting too hot (too loud).
When you’re finished with your narration, press the square yellow Stop button.
To be sure it recorded correctly and sounds like you expected, press the green triangular play button. It is best to listen with headphones for optimal sound.
You can save your work under the File menu, by selecting “Save Project as…” You can delete just the Audio Track to re-record without having to create a new file by clicking on the X in the upper left of the Audio Track itself.
That’s it! You have now completed your Audacity recording. Repeat this process. A lot. Record, play back, listen, make minor adjustments, and repeat. While you may not have enough experience yet to know if the quality of an individual audio clip is good or bad at the start, you can probably tell if one recording sounds better or worse than another. So do a lot of comparisons to find what sounds best. Trust yourself or ask a friend. Be especially alert to do these:
Mic gain through Windows or the mixer should be tuned so there is no activity or just the slightest flicker of green at the left edge of the Recording Level meter when you’re not talking
When speaking into the microphone, you should be pushing the Recording Level meter frequently into the yellow, sometimes to the orange, but only very rarely or never into the red. If you’re not regularly hitting at least the yellow, that’s probably too quiet.
Be sure you don’t push the Recording Level meter all the way into the red so it hits zero. That’s too hot (loud), results in clipping as the computer discards the audio above its processing threshold, and it will sound bad.
Minimize breath sounds, plosives (Ps and Bs), sibilants (hissing Ss), and room echo (a hollow sound). Also be sure there are no audible background noises when you are recording your actual piece (honking cars, kids playing in the other room, etc). Your listeners should not be able to hear anything except your voice or other production audio (music, etc). you may choose to add.
If your audio meets those 4 goals, you’re in great shape!