Note that Scribl is a participant in the Amazon Associates Program, an affiliate advertising program. That means that Scribl can earn fees if you buy anything after following these links. This helps us promote all our authors' books and continue to provide free titles to our customers at our expense. If you are considering buying anything you see listed here, please consider following our link when you do.
Mic + Mixer + your existing computer
Better Option if quiet with no echo in your computer room.
(If it's in stock at Amazon, we would instead recommend the $60 Behringer XENYX 302USB. It's $20 less expensive and a better fit for a single narrator using a dynamic mic, but we haven't seen it in stock recently.)
To do better than just the AT2005 alone, you'll want to add a mixer. To connect to the mixer, you'll use a 3-prong XLR cable. Fortunately, the AT2005 supports that as well as USB and includes both cables (or at least it did at the time of this writing; make sure that's still part of the package when you buy, or grab another decent XLR cable of whatever length you think will make sense). The mixer lets you adjust the gain, and adjust the treble and bass to reduce hiss or rumble, produces less electronic noise than the USB connection in the microphone and generally helps optimize the recording for your voice.
You'll need to adjust these to find what's best for your voice by adjusting these while speaking and watching the meter in Audacity and playing back for quality. To get you started, here's what I found works for me. Start with these settings, then adjust the low, high, gain and level/mic dials to get it just right for you, your recording room, and the natural added gain and noise of your computer. See #5-#9 in the setup steps below for more on configuring the mixer options:
Gain: 6 (each tick is 1, so 5 is straight up)
Low: +0 (center)
High: +1 (1st line above +0)
Pan: center
Level (Q502USB) or Mic (302USB): 6 (same numbering as Gain)
Physical setup for AT2005 + XENYX Q502USB or 302USB
Put the windscreen over the ball of the ATR2100.
Connect the USB cable from the USB port on the back of the XENYX to your computer (see image above for USB port location).
Connect XLR cable to AT2005 and to the port on the upper left on the face of the XENYX 302USB (see the image for XLR location).
If you want to use the included mic-stand, set the microphone in the stand. Note that if you place the mic stand on your desk, that's probably too far from your mouth for good sound - in amplifying that to be loud enough, you'll also need to amplify a lot of noise. Always try to be within a few inches of the mic, typically no more than 8", and preferably 2-4" (too close and you may get plosives without a pop shield). Also, you want to be sure you avoid noises from shifting your hand as you hold it or touching the table or desk on which it's sitting. It will pick up any such noises and those will ruin your recording. A microphone boom arm and shock mount serve to isolate the mic from these noises and will do much better than the included stand. See Optional Upgrades.
Setting the buttons: These settings will allow you to use headphones both to monitor your recording as you speak and also to play back through the XENYX to listen to the final product without needing to ever make any changes to switch back and forth. There should be no need to ever change these button settings whether you connect headphones or not.
Xenyx 302USB: Depress the red FROM button under LINE/USB, so it's set to USB PLAY. Leave the two black buttons to its right, LINE/USB TO and 2-TRACK, up and set to MAIN MIX, though these won't matter if you have nothing else connected besides a mic and headphones.
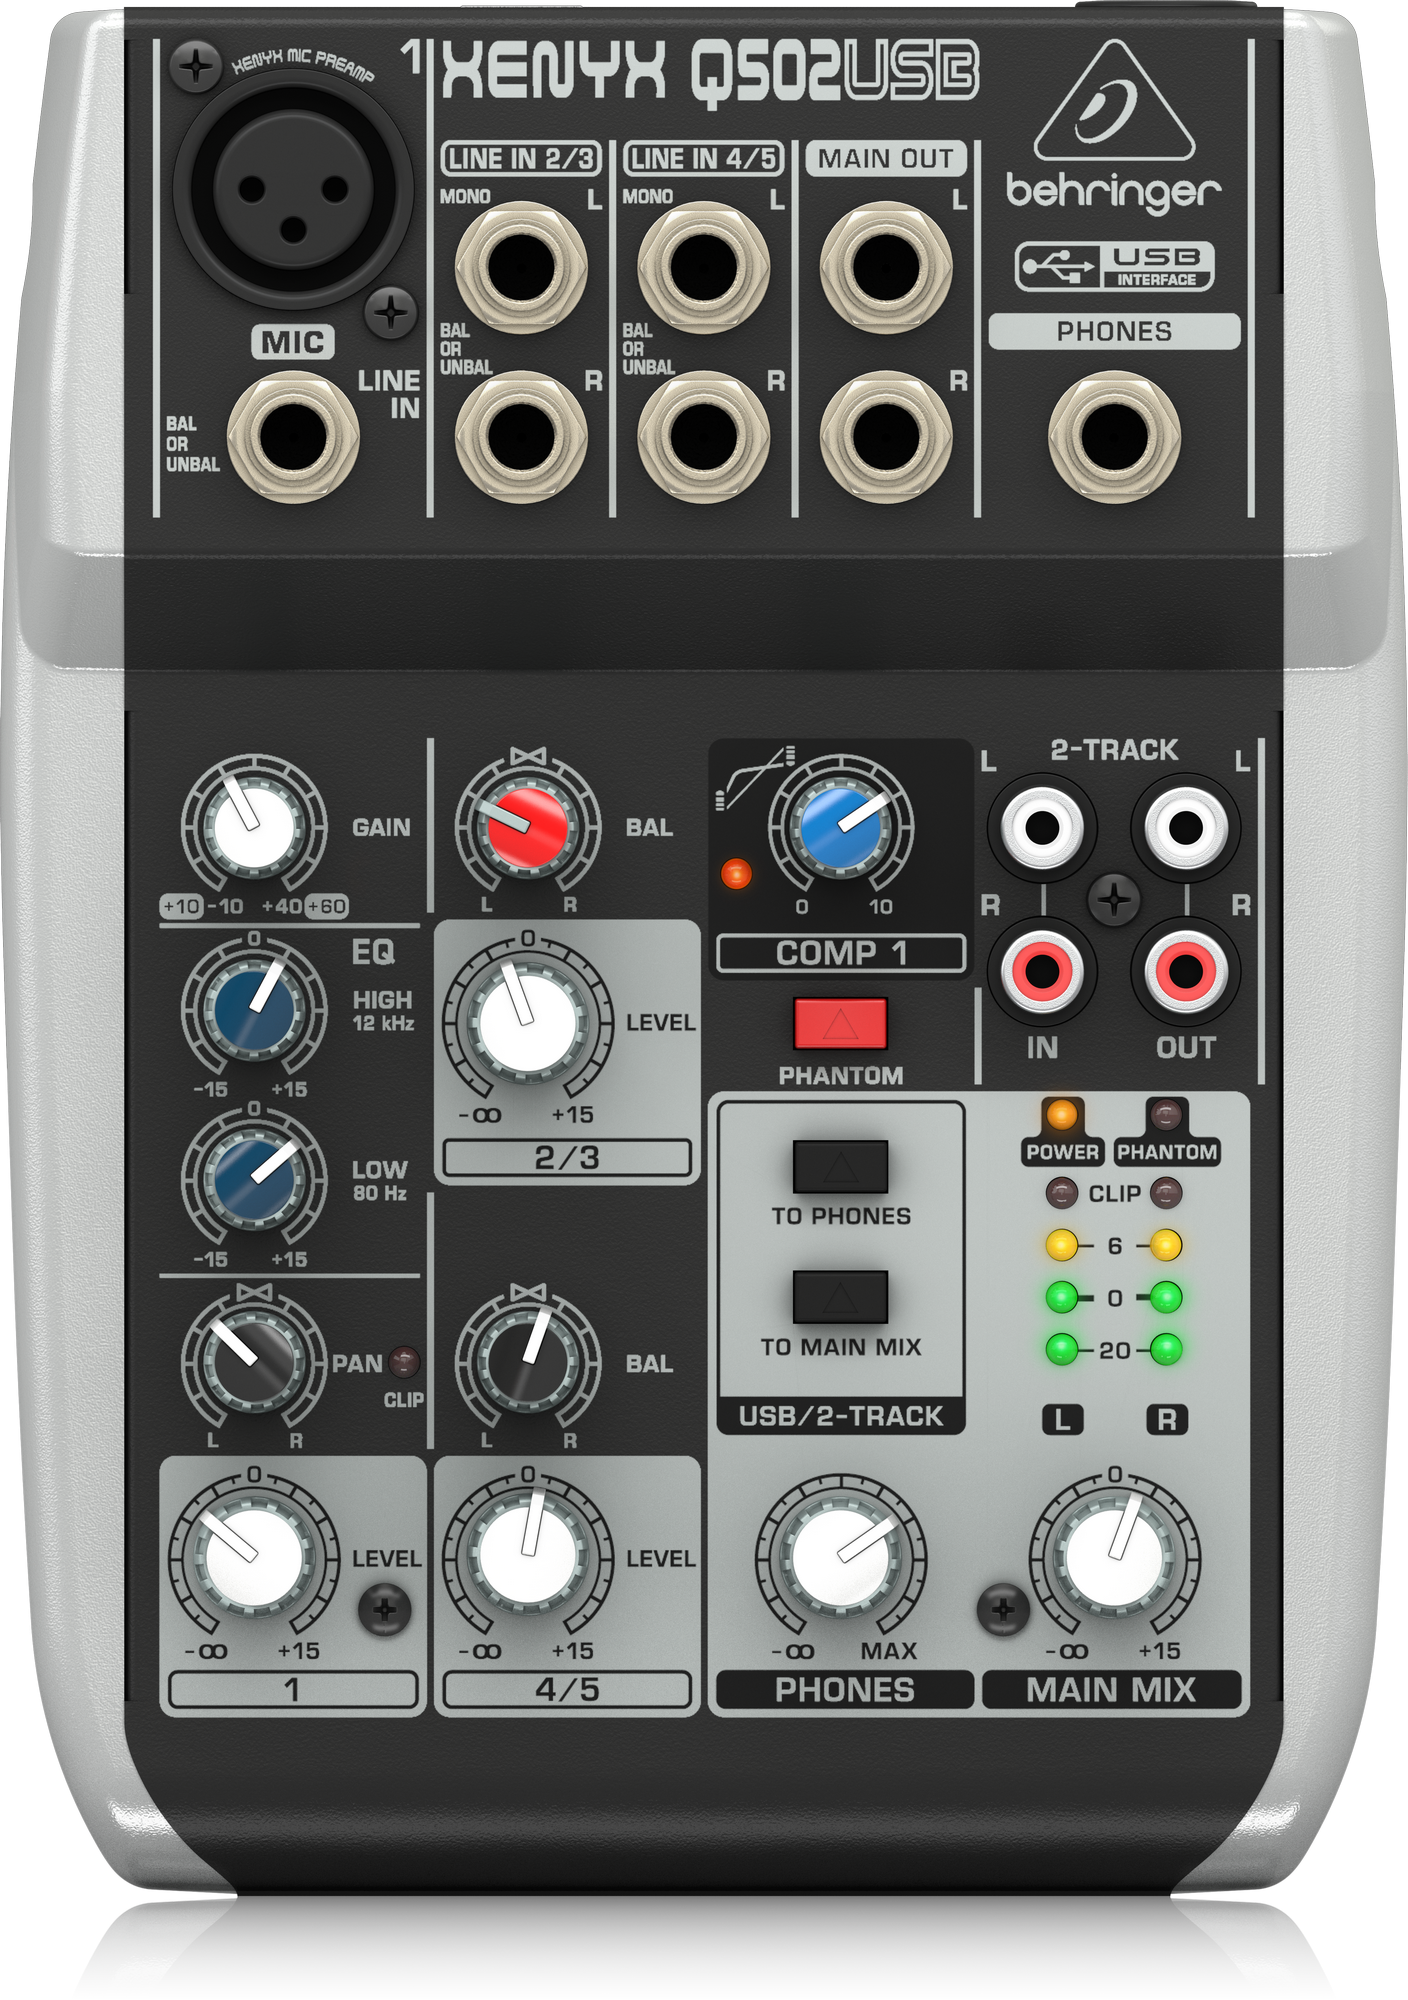
Xenyx Q502USB: Press the "TO PHONES" button. If you're using a condenser mic, be sure to provide power to the Xenyx Q502USB and press the Phantom button. Dynamic mics don't need or use phantom power.
Setting the recording dials and levers: There is no one right group of settings that can apply in all cases. Depending on your voice, differences in your electronics and computer, the line-in recording level on your computer, and background noise in your room, some experimentation will almost certainly be needed. There are 4 controls that affect the recording: the GAIN and MIC (302USB)/LEVEL (Q502USB) dials on the left side of the unit and the LOW and HIGH levers (302USB)/dials (Q502USB) between them.
GAIN and MIC/LEVEL dials: For the novice, in order to reduce the number of things you are changing, we recommend keeping the GAIN and MIC (302USB)/LEVEL 1 (Q502USB) set to the same value as each other. I found setting these to 6 provided the right sound level without introducing too much noise with my equipment. Start there, but be prepared to change this (turning both dials up or down together, so their settings remain equal) while monitoring your signal and noise levels when you get to the sections on Getting Everything Ready to Record with Audacity and Recording with Audacity.
LOW and HIGH: These set the tone of your voice. I found setting LOW to 0 (center) and HIGH to +1 worked well for me, but that's not necessarily right for you. If there's too much rumble when playing back your recording, turn down the LOW and try again. If your voice sounds hollow turn up the LOW. If there's too much hiss, turn down the HIGH. If your voice sounds muddy or muted, like you are talking through a sock, turn up the HIGH. As with the GAIN and MIC, some experimentation will help you find what sounds best.
Record a piece, play it back, make small adjustments and try again until you like what you hear, as described in Recording with Audacity.
If using headphones (we recommend you do), then also follow steps #8 and #9 below.
Plug them into the HEADSET jack in the upper right on the face of the XENYX (see the image for HEADSET jack location). Note that you cannot use the headphone jack built into the mic when connected through a XENYX mixer, because the jack on the AT2005 only works when it's under USB power. Connecting the headphones to the XENYX also lets you hear the effects of the adjustments you make on the mixer, which can be very helpful once your ears get used to this.
There is a slight difference in the headset jacks between the 302USB and Q502USB. The 302USB uses a 3.5mm or 1/8" (same thing) jack. The Q502USB uses a larger 1/4" plug. Other than the size of the connector, the usage is the same.
Recording
When speaking, point the top of the mic toward your mouth. Don't talk to the sides of the mic.
Tune the XENYX, using the settings above this list as a starting point. You'll need to make recordings and adjustments a few times to find the setting combination that sounds best for you and your recording environment.