Note that Scribl is a participant in the Amazon Associates Program, an affiliate advertising program. That means that Scribl can earn fees if you buy anything after following these links. This helps us promote all our authors' books and continue to provide free titles to our customers at our expense. If you are considering buying anything you see listed here, please consider following our link when you do.
Getting Everything Ready to Record with Audacity
You will use Audacity to either record directly, such as with the AT2005 mic, or to work with the files recorded by the Zoom. Once the file is recorded and open in Audacity, the process is the same regardless of whether you recorded with Audacity or the Zoom. This section will explain how to use Audacity to record your audiobook.
There are several steps here, but please don't feel intimidated. These steps are very simple (like turn your mic on) and this first part is a one-time setup. Unless you change microphones, you won't have to do this again. Plus, much of this is only to cover contingencies in case you run into problems. Don't worry, this will be easy.
If your mic or mixer has a switch, turn it/them on. Make sure the USB cable from the mic or mixer is connected to the computer.
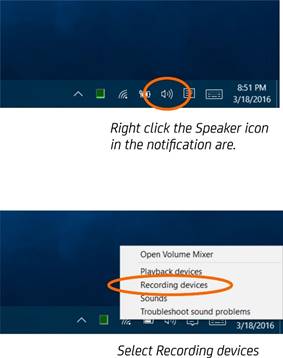
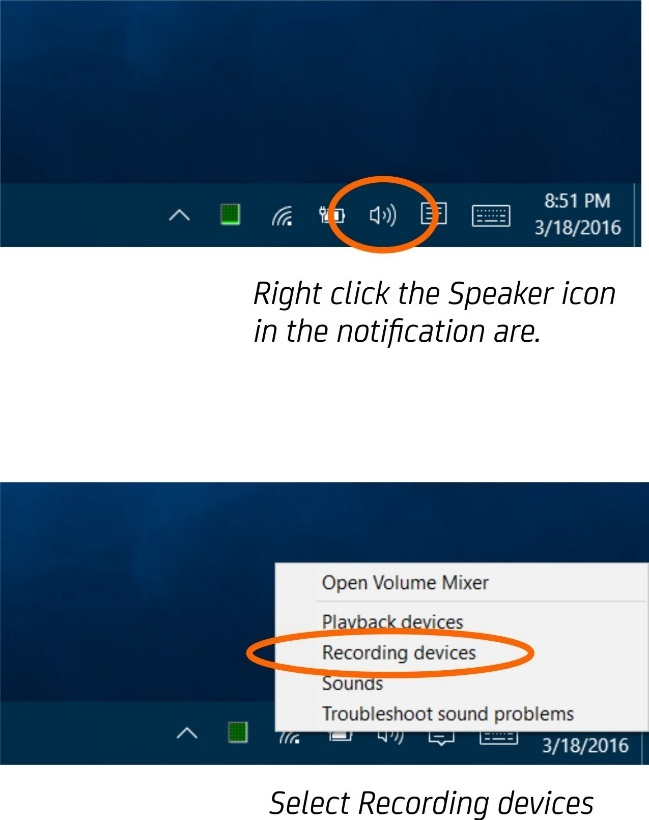
On your computer, right click on the speaker icon in the Notification Area near the clock and select "Recording devices."
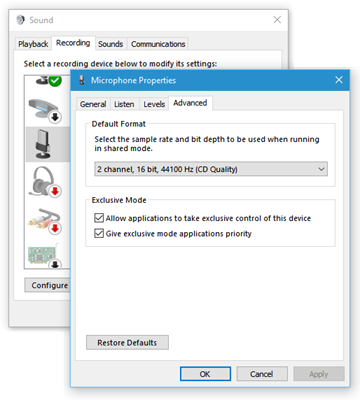
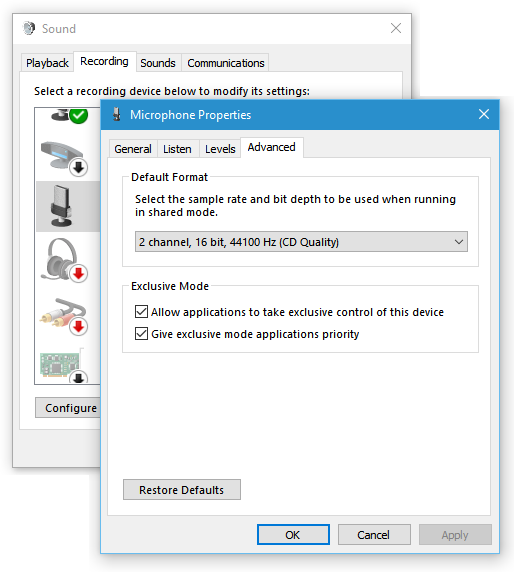
Double-click on the microphone icon that corresponds to the mic you will be using to open its properties. If you're not sure which icon goes with your mic, tap or talk directly into the mic to see which one shows the sound in its green volume meter on the right side of the window. Note: If you still can't find your microphone or believe it's not listed, double check the cables and that everything is switched on, then disconnect USB cable, leave it disconnected for about 30 seconds, then reconnect it. This should cause your system to re-scan the mic. If you are plugging into a USB hub, rather than directly to your computer, be sure other USB devices in the hub are working (and the hub has power if it's an externally powered hub), to confirm the problem is not the hub itself. If all else fails, try restarting your computer with the mic connected so it's plugged in when Windows starts.
Click on the "Advanced" tab. Under Default Format, select "2 channel, 24 bit, 44100 Hz" if you have that option. If you don't have a 24-bit option, then select the 16-bit equivalent, "2 channel, 16 bit, 44100 Hz." Do NOT select any choice with anything other than 44100 Hz, such as the 48000 Hz option you are likely to see. Be sure both of the options under "Exclusive Mode" are checked.
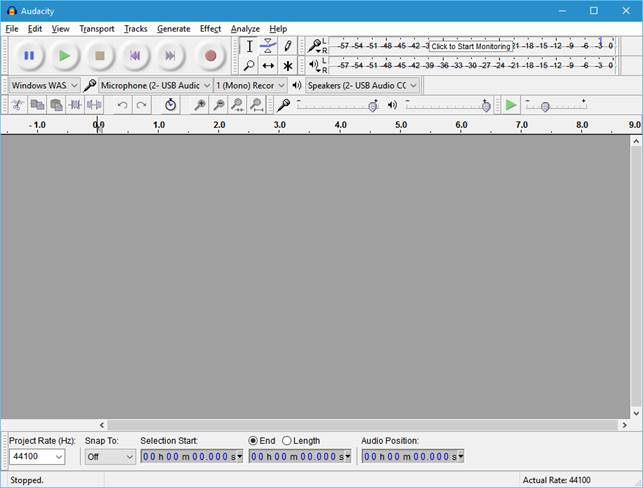
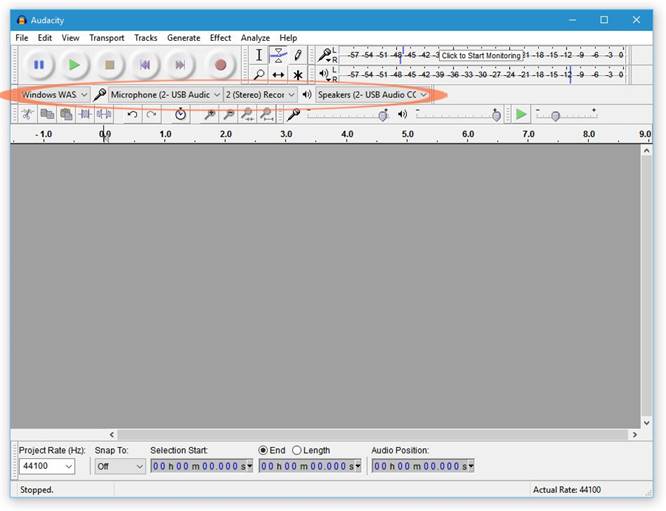
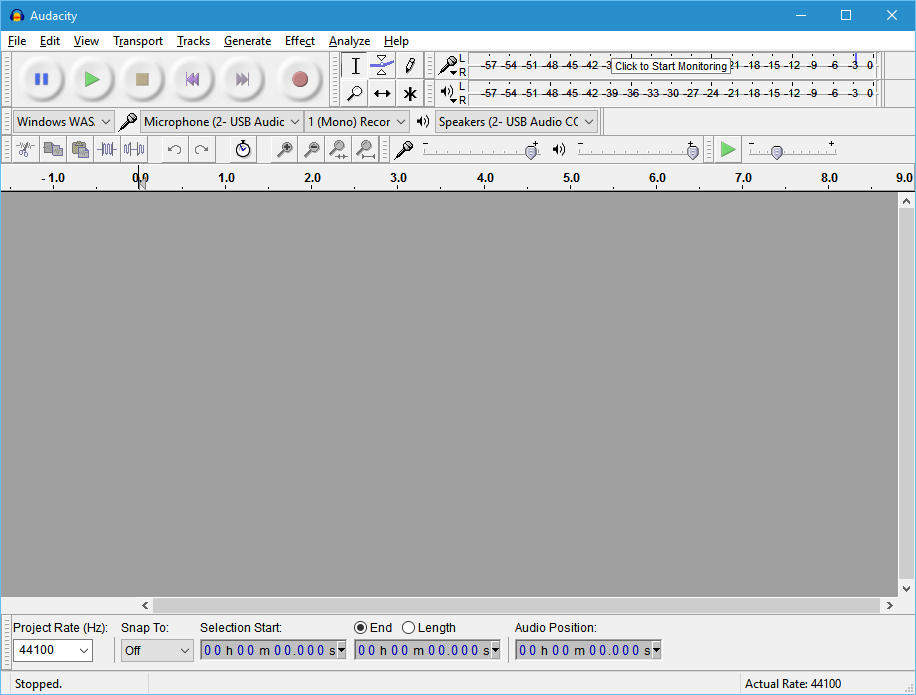
Launch Audacity and expand the window so you can see all of the toolbars, or grab the small handles to the left of the toolbars and drag them down so they all fit on the screen. It should look something like this.
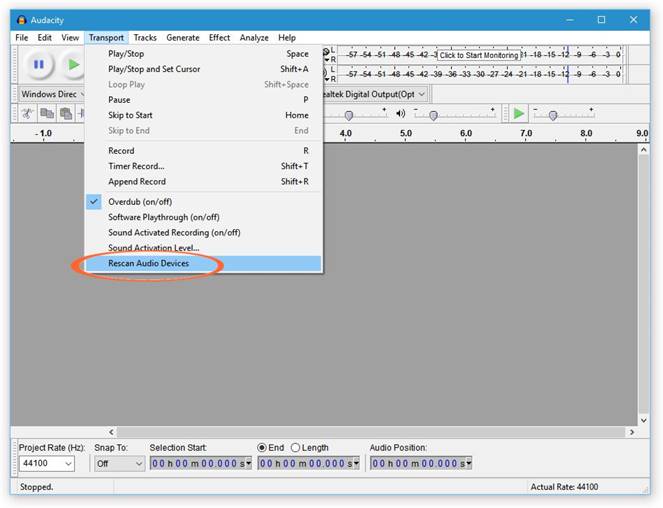
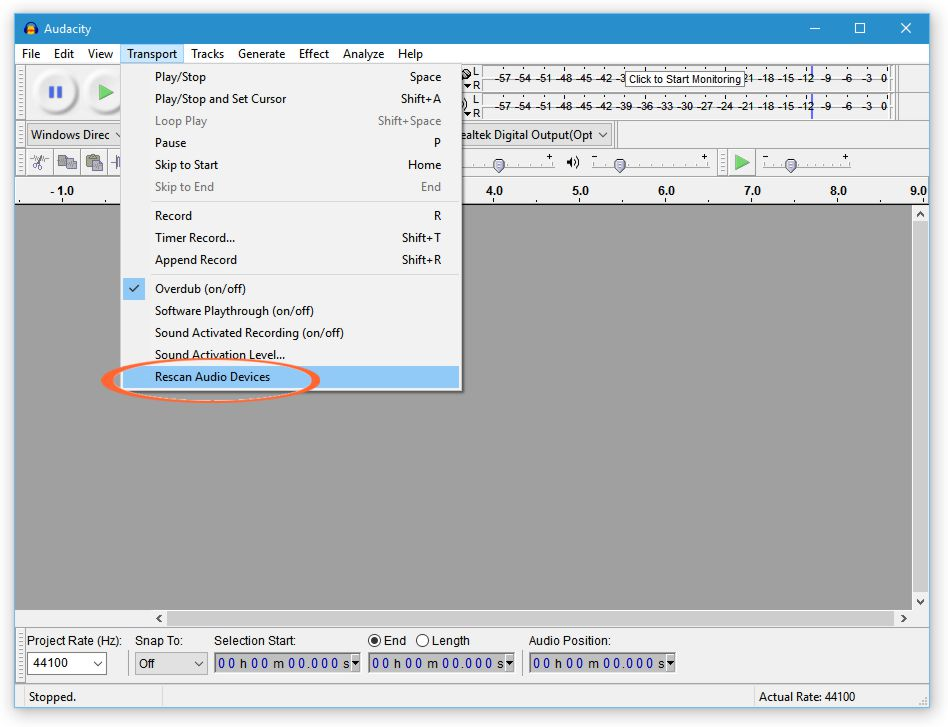
Whenever changing the recording devices available, it's good to force Audacity to refresh. Click on the "Transport" menu, then select "Rescan Audio Devices." This is most commonly needed if you started Audacity before you had your mic powered on, connected, and recognized by Windows. If none of those apply to you, you should be able to skip this step.
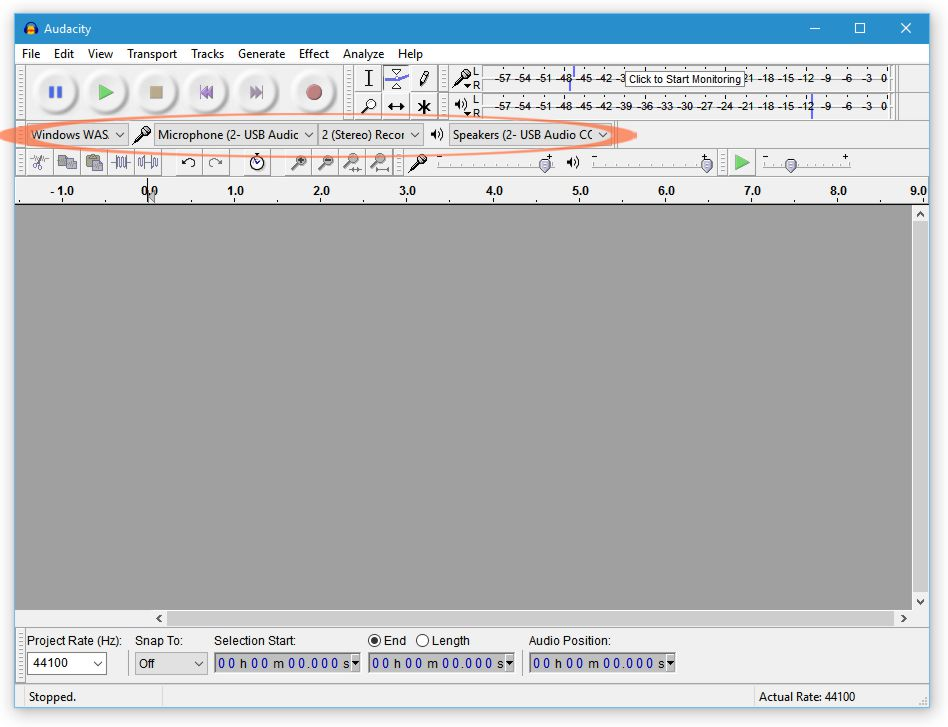
Now we need to select the correct recording device. In the Audacity Device Toolbar there are 4 settings from left to right: Audio Host, Recording Device, Recording Channels, and Playback Device. If you hover the mouse over each of the separate drop-downs, Audacity will tell you which is which.
Starting with the Recording Device, the second drop-down from the left next to the microphone icon, select the device that corresponds with your recording device. If using the AT2005 , this will include the words microphone, ATR, and USB, such as "Microphone (ATR USB microphone)." If recording through the Xenyx mixer, it will be similar, but not include ATR, such as, "Microphone (USB Audio CODEC)." In the screen shot above, we have selected the Xenyx Mixer: "Microphone (2- USB Audio CODEC)."
Even though you are probably only recording in mono with a single mic, in the next drop-down, select "2 (Stereo) Record."
On the rightmost drop-down, select the Playback device that corresponds to the speakers you want to play back the recording. We recommend using a pair of headphones for playback so you can better hear subtle differences. If so, for all of the hardware recommended here, that means you should connect the headphones to your recording device and select the same Playback Device here as the Recording Device you selected earlier.
Last, choose the Audio Host from the leftmost drop-down. This will probably default to MME. Do NOT use MME, unless none of the other choices work on your computer. MME is the most universally compatible system, but it's also the lowest quality. For the simplest choice with good quality, select Windows DirectSound. For a potentially more complex option that will produce the best possible sound quality on your computer, select Windows WASAPI. Windows WASAPI often requires that your Recording Device and Playback Device from the prior step be the same (forcing these to be the same may not fit with your playback needs, and that's the added complexity).